
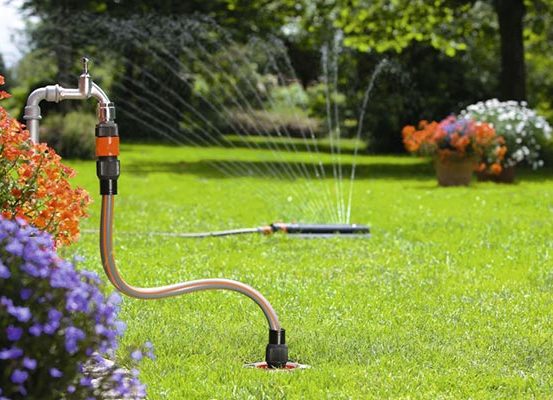
If you grow roses, for sale or just have a few flower beds for the beauty of the yard, you know what manual watering is – dragging hoses around the yard and moving them every half hour or so. A site irrigation system, which is a network of plastic pipes and sprinklers or drippers that reach every part of the garden you want to water, saves you from this.

The materials required for water supply through micro-irrigation are easy to install, tools include pruning shears and a special hole punching tool. Once you lay out the tubing and connect the drippers, sprinklers or sprayers, you can water your plants by simply turning on the water. Add a self-powered controller and you don’t even have to turn the irrigation water on/off. The controller will automatically turn the water on and off at the time you specify.

Micro irrigation saves more time and energy; it saves water by distributing it more efficiently. Because you’re using dozens of sprinklers to replace one regular sprinkler, you have much more control over where the water goes and at what pressure. Instead of flooding the soil all at once, micro-irrigation delivers small amounts of water over longer periods of time, allowing the moisture to soak into the plant’s root zone for maximum benefit. . In this article, we will list the basics of steps to create water supply on a plot of land.

Create a project and plan a drip irrigation system
If this is your first experience with micro-irrigation, start small and experiment to understand how the system works. Choose one or two flower beds or a small plot and install a simple one-zone water supply system.
The main task of water supply planning is to choose the best device for watering each type of plant. Then determine the flow rate that provides enough water for each plant in the irrigation zone. Set up a water system for one to two hours at a time, two or three times a week. Start by measuring the area of your garden and creating a simple water system plan. Choose the type and rate of irrigation devices based on the soil and the plants’ watering needs. Mark them on the drip irrigation system diagram and draw a piping route to connect them.

Sprayers, droppers, sprinklers, splinters.
Try to cover all the root zones of the plants. Don’t worry about getting everything perfect at first. Add a few extras for each watering type. Once you see how the water system works, you can easily move or add different sprinklers to get a more balanced water flow or better coverage of the irrigation area.

The first watering.
Now you are ready to turn on the water and see how your new water system works. Let the water run for an hour. Then check around the plants to make sure the root zone is completely wet. Change the system settings by adjusting the timing, adding or moving watering.
Maintains the water supply system on the site.
Maintain the water supply system on the site – clean the filter once a month (more often if you have water with a lot of sediment). Check the drippers occasionally to make sure they are working. In the fall, prepare by removing the shut-off splitter, non-return valve, regulator, filter and pressure regulator. Remove the plugs and drain the water from the system.
You can contact us about land water supply and also visit our garden center store Mon-Fri from 8:30 a.m. to 6:00 p.m.